Contribution Guide
We value your contribution
We are both a welcoming and an open community. We warmly invite you to join us either as a user or a community contributor. We will be happy to hear from you.
Please, follow these steps
Step 1: Forking and Installing IceVision
1. Fork the repo to your own github account. click the Fork button to create your own repo copy under your GitHub account. Once forked, you're responsible for keeping your repo copy up-to-date with the upstream icevision repo.

2. Download a copy of your remote username/icevision repo to your local machine. This is the working directory where you will make changes:
git clone https://github.com/username/icevision.git
cd icevision
- Install icevision as an editable package. As a best practice, it is highly recommended to create either a mini-conda or a conda environment. Please, check out our Installation Using Conda Guide.
First, locally install the package:
pip install -e ".[all,dev]"
Then, set up pre-commit hooks using:
pre-commit install
Step 2: Stay in Sync with the original (upstream) repo
- Set the upstream to sync with this repo. This will keep you in sync with icevision easily.
git remote add upstream https://github.com/airctic/icevision.git
- Updating your local repo: Pull the upstream (original) repo.
git checkout master
git pull upstream master
Step 3: Creating a new branch
git checkout -b feature-name
git branch

  master
  * feature_name:
Step 4: Make changes, and commit your file changes
Edit files in your favorite editor, and format the code with black
# View changes
git status  # See which files have changed
git diff    # See changes within files

cd to/icevision/folder
black .

git add path/to/file
git commit -m "Your meaningful commit message for the change."
Add more commits, if necessary.
Step 5: Submitting a Pull Request
1. Create a pull request git
Upload your local branch to your remote GitHub repo (github.com/username/icevision)
git push
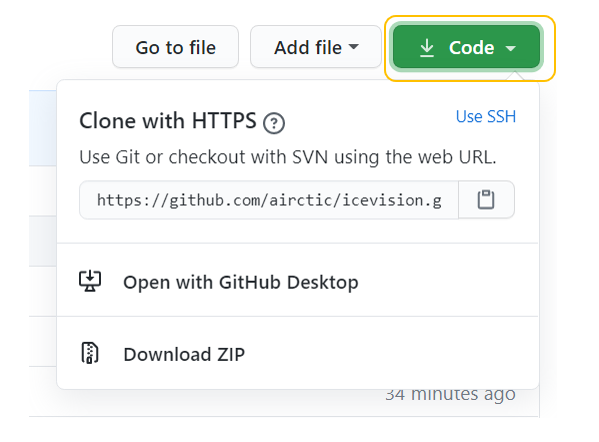
After the push completes, a message may display a URL to automatically submit a pull request to the upstream repo. If not, go to the icevision main repo and GitHub will prompt you to create a pull request.
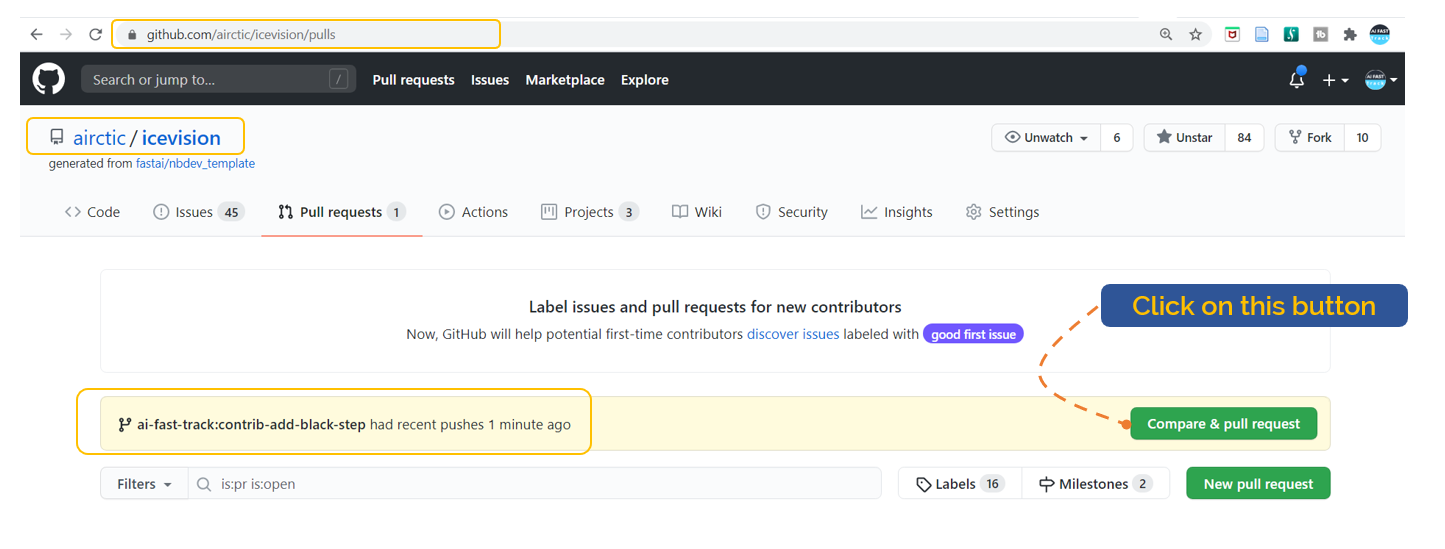
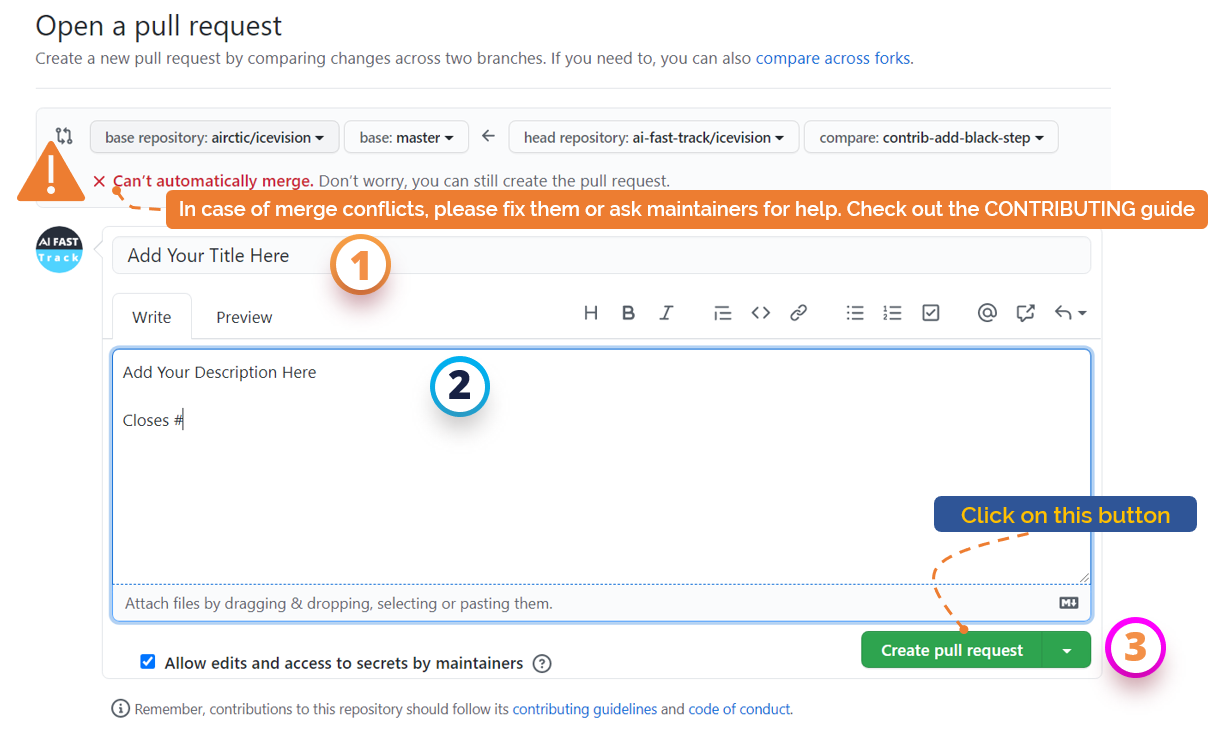
Fill out the Title and the Description of your pull request. Then, click the Submit Pull Request
2. Confirm PR was created:
Ensure your PR is listed here
3. Updating a PR:
Same as before, normally push changes to your branch and the PR will get automatically updated.
git commit -m "updated the feature"
cd to/icevision/folder
black .
git push origin <enter-branch-name-same-as-before>
Reviewing Your PR
Maintainers and other contributors will review your pull request. Please participate in the discussion and make the requested changes. When your pull request is approved, it will be merged into the upstream icevision repo.
note
IceVision has CI checking. It will automatically check your code for build as well.
Resolving Conflicts
In your PR, you will see the message like below when the branch is not synced properly or changes were requested.
"This branch has conflicts that must be resolved"
Click Resolve conflicts button near the bottom of your pull request.
Then, a file with conflict will be shown with conflict markers <<<<<<<,
=======, and >>>>>>>.
<<<<<<< edit-contributor
Local Change
=======
Remote Change
>>>>>>> master
The line between <<<<<<< and ======= is your local change and
the line between ======= and >>>>>>> is the remote change. Make the
changes you want in the final merge.
Click Mark as resolved button after you've resolved all the conflicts. You might need to select next file if you have more than one file with a conflict.
Click Commit merge button to merge base branch into the head branch. Then click Merge pull request to finish resolving conflicts.
Feature Requests and questions
For Feature Requests and more questions raise a github issue. We will be happy to assist you.
Be sure to check the documentation.